Reaching your “h drive” at home

While you can’t actually “reach” your h drive at home, you can sync it.  Here’s how:

From school, open My Computer, and right click on your H drive. Select “Make Available Offline.” When you shut down your computer at the end of the school day, it will sync your H drive contents. Then from home, you’ll just open My Computer and can work on your H drive materials. When you log back in at school, it will sync again.

Thanks, Pam, for these directions!

Adjusting the power scheme on your laptop

Adjusting the power scheme on your laptop:

  • right-click on your desktop background
  • choose Properties
  • click the Screen Saver tab
  • click the Power button
    • click on the drop-down arrow for the Power schemes (presentation works well)
  • view the different schemes and settings
  • make any changes you desire
  • click OK

This will keep your computer from going to sleep too often.

Installing a network printer

Installing a network printer:

1. Click on the Start button
2. Click on Run
3. Type this: \\ps and click OK
(the ps stands for print server)
4. Scroll down to the printer names that begin with “e” for East or “g” for GWC
5. Double click the printer you wish to install
6. When the small empty print window opens, you’re connected. Just click the red x in both open windows to close them.
7. Now your printer should be available to use from any program.

Just be aware that this is user specific. If you log as yourself on a computer that you have never used before, you will need to install a printer before you can print.

Thanks, Pam, for these simple directions!

Quizdom PRS (Clickers) Tutorials

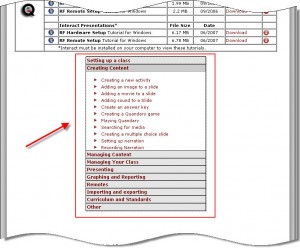
I know lots of teachers have wanted to use the Quizdom Personal Response System (clickers) this year but haven’t found the time to sit down and “play around” with the software. The software is installed on teacher laptops, so if you want to look at it over the summer (or just remember this post for next year), the Quizdom website contains some step-by-step tutorials you can check out to help. An example of one is below.  To see more, click here.

When visiting the site, I suggest you focus on the tutorials under in the middle of the page:

Please let you know if you create anything! It would be nice to gather a collection of Quizdom activities to be used across the division!

Upside down and Sideways Computer Displays

I’ve had a few questions lately about upside down and sideways computer screens.  There’s an easy fix to this problem!  The following keystroke combinations will change your computer display:

  • Ctrl + Alt + Up Arrow — right side up
  • Ctrl + Alt + Right Arrow — sideways 90 degrees
  • Ctrl + Alt + Down Arrow — upside down or 180 degrees
  • Ctrl + Alt + Left Arrow — sideways 270 degrees

Download Handouts

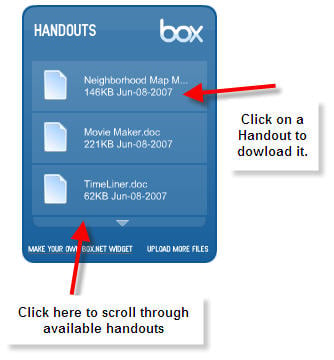
There are handouts for most of the programs we use at school (and some websites too) available in the blue box to the right. Here’s how you find them:

Use the arrow at the bottom of the box to scroll though the list of handouts. When you find one you want, click on it.bluebox1

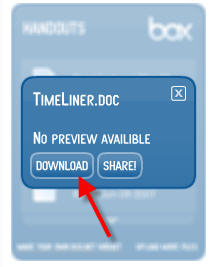
Then click on DOWNLOAD.

bluebox2

Choose a place to save the handout on your computer so you can find it. Then click save.

bluebox3

Using Word Docs and PowerPoints with the Smartboard

I’m dedicating the next two or three posts to answering some Smartboard questions that have been asked since our recent in-services. This is one I’ve heard a lot:

How do I use my Word Documents and PowerPoint shows with the Smartboard? It just so happens I ran across two really great 60 second videos to show you how!

Inserting a Word Doc into Smart Notebook:[kml_flashembed movie="http://www.youtube.com/v/yR95aDs1o4Q" width="425" height="350" wmode="transparent" /]


Inserting a PowerPoint into Smart Notebook:
[kml_flashembed movie="http://www.youtube.com/v/VxnB-Ev_4RM" width="425" height="350" wmode="transparent" /]

A big thanks to the Brighton School System and their blog, 2020 Schools, for posting these videos! Check out their channel in itunes called, “:60 Sec. Tech.”

What is RSS?

This past year I’ve noticed that a bunch of educators in our system have started blogging. One of the easiest ways to keep up with all these new blogs (in one place) is to use RSS. Here’s a simple explanation created by commoncraft:

[kml_flashembed movie="http://www.youtube.com/v/AwtmOPdrEL8" width="425" height="350" wmode="transparent" /]

I use Google Reader, but there are other feed readers out there like Pageflakes or Netvibes. If you want one already set up for you, check out this one on Pageflakes–it’s all set up for Salem City Schools, complete with RSS feeds for the blogs I know about (let me know if I’ve missed yours), local weather, and local news. You can bookmark it and use it like it is or create your own account so you can add your own things.

SCS Feeds Page on PageFlakes

Download Video: Posted by tcoffey at TeacherTube.com.

Update (1/7/08)

I’ve noticed that Pageflakes sometimes runs really slow at school. If you are having trouble, you can use Netvibes instead. I’ve set up the same feeds there too. Netvibes does take awhile to load initially, but if you login and save the page, the next time you visit, it will load a lot quicker. Click here to try: Add to Netvibes After you click on this button, make sure to choose “yes” to preview the page and “yes” to add it to your page, even if you do not have a Netvibes account yet.
Smartboards

I’ve been frequently asked about learning to use the Smartboard. Well, here are some links that will help you get started!

First, if you are on a computer that doesn’t have the Smartboard’s Notebook software (for instance, if you are working from home), download it by clicking the link below:

SMART software

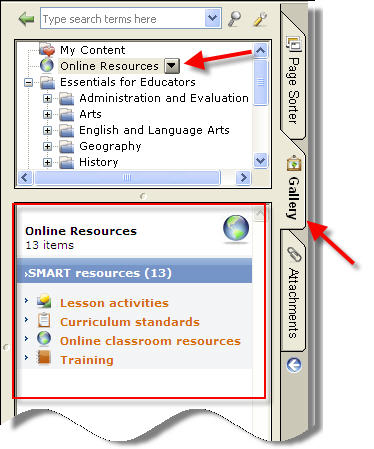
After you’ve played a bit with the Notebook software, you might want to download some pre-made lessons. You can search for content from within the Notebook software (see picture).

onlineresources.jpg

You can also search by grade and subject on the SMART Technology Website:Download pre-made lessons from SMART Technologies

You may also want to check out this handout to help you out:

Creating Lessons with Notebook Software

A couple of other things to explore:

Lesson Activity Toolkit

My delicious links for the Smartboard

Assigning Students Fast Math

  1. Log into your teacher account.
  2. Click on the settings tab.
  3. Select all your students by clicking on the first person, holding down the shift key, then clicking on last person.
  4. Left click on the small triangle under “program assignment.”
  5. Choose what problems to assign.
  6. Green circles will appear by each child’s name. This means they are ready to start!

For full color directions (and pictures), please find the Fast Math handout in the blue box.