4th Grade Jamestown Geocaching

A few weeks ago, a teacher came to me wanting to do a Jamestown Geocaching Activity with her students.  I had been doing a lot of work on iPads, and had enjoyed some of the quick, 1 minutes video podcasts by History is Fun.org.  I decided to incorporate both the iPads and Geocaching into one activity.  Here’s the activity I created:

1.  Download Podcasts videos to at least 6 iPod Touches/iPads from iTunes.  You can find them here: Historyisfun.org Podcasts.  You’ll need the following videos:

  • The Voyage
  • John Smith
  • Powhatan/Pocahontas
  • Hardships
  • Representative Government
  • Women
  • Slavery (I used this one as a practice example)

2.  Hide 6 Caches with the following labels on each cache: Jamestown Cache Labels.  Mark the locations of the caches with the GPS Units.

3.  Students were broken up into groups, and given a clipboard, a Jamestown Geocaching Answer Sheet, an Order Strip for 6 Caches, and an iPad with the videos (but iPod Touch would work too), a pencil, and a GPS Unit.

4.  Students worked in groups to find and answer the questions using the videos.  I suggest the following jobs for members the group:

  • Navigator (Works GPS Unit)
  • Scribe (Writes the group’s answer)
  • Governor (Keeps folks on track, carries the number strips, reads the cache questions)
  • Historian (Carries the iPad/iPod Touch and plays the appropriate video)
  • Scout (Double checks to make sure the group is at the right cache number, Re-hides the Cache in the exact location, )
  • Judge (Checks the group’s answers with the QR Codes)

5.  When students were finished, they used the app, Scan, and the following Jamestown Geocaching QR Codes to check their work.  A traditional Answer Key is located here if you do not have time for this part of the activity.  Students re-watch the videos for the questions they’ve missed.

So far I’ve had two classes complete this activity, and they loved it!  I liked using the iPads because they were big enough for the entire group to see.  I found it really important to discuss reading the questions BEFORE watching the videos…and practicing with the Slavery video was very helpful.

____________________

Image:  Kolk, Melinda. compassrose.jpg. 1-Apr. Pics4Learning. 9 Nov 2012 <http://pics.tech4learning.com>


Pinterest Folks to Follow!

Pinterest Logo

By now, many of us have heard of  Pinterest.  For me, it took me awhile to “get it,” but now that I have, it’s been a place I go often for teaching tips, recipes, decorating suggestions, and so on.  There are some great resources out there for teachers!  Here are some of the ones I follow for good ideas:

Here are some suggestions for using Pinterest as a teacher:

If there’s anyone I’ve missed that you enjoy, please leave a post and let me know!

Updates to Interactive Achievement

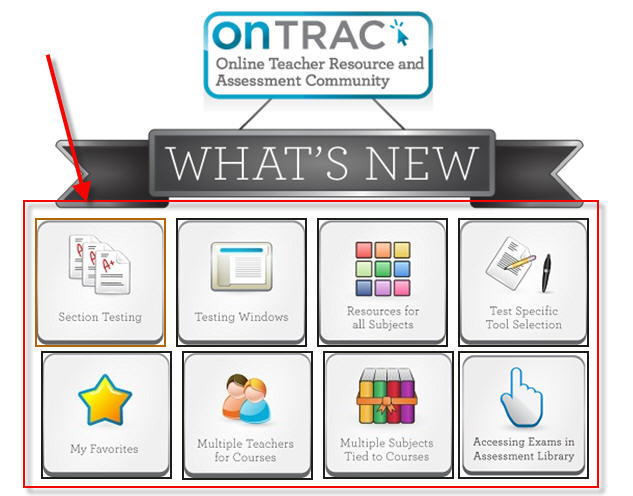
There have been some changes to the Interactive Achievement Program, the program Roanoke County uses for Formative Assessment.  Luckily, the folks at IA have provided some great handouts to show how to use the updated features.  To find them, login with your IA account.  You will now need to use your whole email address as your login (your password will be the same).

Then, click on “What’s New” in the top right-hand corner.

Next, click on a topic.   A handout will open for the topic.

The ITRTs have also updated the how-to handouts for IA.  You can find them here:

Assessment Library

Assigning Tests

Creating Class Lists

Print Test Session Lists

Reporting

Starting and Ending a Test


Finally, don’t forget that our system pays for support from IA, and it’s available to anyone who needs it.  Just click the ? in the top right corner.


Read to Me


Watch on-line streaming videos of children’s books read aloud by celebrities!  Check out the Read to Me Website!

On this site, children’s storybooks are read aloud by celebrities and storytellers.  Books are available for watching  and there are even lesson plans to help you incorporate the Read-To-Me videos.  You will see such stories as Fancy Nancy, Duck Soup, Excuse Me, Chrysanthemum, and even Hooray Hose (with Sign Language).  Very cool!


Explore the Barrier Reef with Google Maps or Google Earth!

The newest edition to some of the fascinating resources in Google Maps/Earth, is the ability to tour the Ocean, complete with reef wildlife.  To explore some of these locations, you will be using “Street View.”  Here’s a quick video on how to use it:

Great Barrier Reef

Hawaii
There are other collections too, including the Amazon, Antarctica, Historic Italy, World Landmarks, Nasa, and much, much more.
You can visit all the collections here:
If you find anything that helps your teaching, leave a comment here and let us know!

Letters Alive

Preschool Teachers and Primary Special Education Teachers received a new program, Letters Alive, to use with their students!  It’s pretty cool.  See a video below that talks about it:

When trying to implement this program, we discovered a couple of things that may help others, so I’m sharing them here.  The most important thing we learned was that this program needs an integrated video card with lots of memory in order to work properly.  If you descide to use it, it’s very important to work with Logical Choice before purchasing anything to make sure the computers you plan to run it on will work.

If you are one of the teachers that was lucky enough to recieve a kit, here are some things that may help you out!

 Letters Alive Tips and Tricks

  •  Use your cart for Letters Alive. Keep the document camera with the cart and leave it set up.
  • Make sure mat is flat as possible (store rolled, not folded).
  • The neoprene Mat is washable (do not put in dryer).
  • You can wipe cards with damp cloth but DO NOT LAMINATE or submerge.
  • Make sure the dongle and document camera are plugged in.
  • Keep the document camera as high as possible.
  • Use training videos in the software.
  • Bring alphabet card in from the right (up high).
  • Be careful not to cover cards.
  • The program runs in Full Screen Mode.  Use Esc to exit and Alt+Enter to go back to full screen mode.

 If you are having Document Camera isses:

  • Choose Letters Alive
  • Choose Letters Alive Camera Setup
  • Make sure auto focus is unchecked

There are three different modes for Letters Alive:

Letters Alive Mode

  • Introduces Letters
  • Uppercase and Lowercase
  • Sentences

Root Word Mode

  • Sounding out letters one at a time.
  • Uppercase and Lowercase practice

T-Shirt Mode

  • This works with Letters Alive T-shirts.

Ideas for the Classroom:

There are lots of ideas for using this program in the classroom on the Logical Choice Website .  Check them out here!

Creating Your Own Discovery Education Account

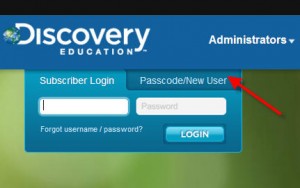
Many of our teachers use  Discovery Education (United Streaming) videos on a regular basis.  Some use the generic school account, but did you know you could have your very own account?   Teachers with their own accounts can save the materials that they use in their own library – making it much easier to find next year. To create your account, you will need your school code (your ITRT knows this).  Then visit http://www.discoveryeducation.com/ .

Step 1: Click on the Passcode/New User Tab.

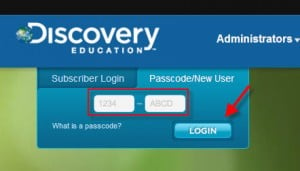
Step 2: Type in the school Passcode.  Your ITRT has this number.

Step 3:  Follow the prompts to set up your Discovery Education account.


You can also follow this webcast that Meg Swecker created:

Creating a Discovery Education Account

I’ll post more soon about using this great resource! :)


Spelling City on the iPods and iPads

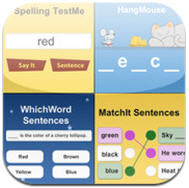
I know many of the teachers in my schools use Spelling City in their classrooms. I see the students come to the computer lab on Fridays to take their tests.  I was so excited, though, to see that the site now has an iPad/iPod Touch app!  Now students can practice in their classrooms or on their own handheld devices.  It does allow you to take the Spelling Test, but it does not allow  you to print results.   You could have students bring you their device when they are done, though, and record their score right off their screen.   If you have the premium membership, student grades area already recorded for you in a grade book  like format.

Make Your Own Presidential Ad!

Want to be President?  Well, you can at least make your own commercial!  Try it out here:

Presidential Campaign Ad-o-matic

You can definitely grab your students attention, or have them make their own as the beginning to a writing prompt.  During the process students will need to upload their pictures, choose their political party, and choose the items in their platform.  Very fun!

Computer Lab Makeovers

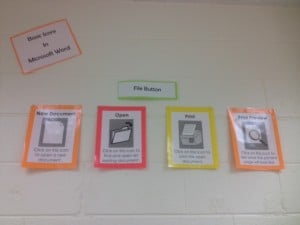
I work at three different schools, and they each have two computer labs.  Periodically I’ve tried to add posters and other decorations to the lab walls, but haven’t been able to really add things like I’ve wanted.  So this year, I spent time making posters and bulletin board items that focus on some of the new things teachers are being asked to cover while in the lab.  I made 6 copies of everything, made an appointment to use the district laminator, and bought a bunch of stick goo and tape.  The labs now look completely different, and I’m really happy with their transformation.  I wish I’d taken before and after pictures because the labs are all very different in their setup, but I did not.

To get ideas, I first started in Teachers Pay Teachers.  If you haven’t checked out this site before, it has great resources made by teachers for teachers…and most things are free or cheap.  I bought copies of MS Word icons for three of my labs to help assist with the new online writing push.  I added some signs to split these icons onto tabs (for MS Office 2007 and 2010).  I also bought a couple of copies of Technology ABCs for two of my labs that have space for an alphabet around the top of the room.  I also got some great ideas from looking at some of the other posters and signs on this site.

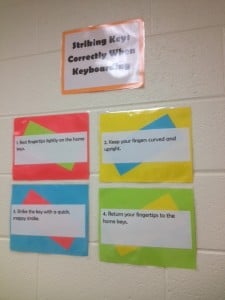
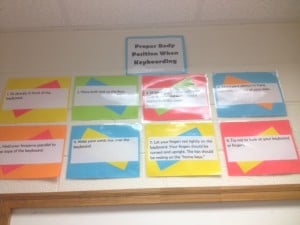
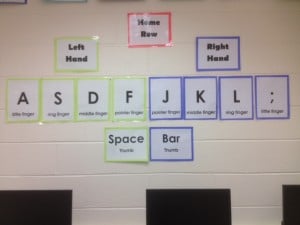
Keyboarding is being pushed by our district because of the SOL Writing Tests students are now having to type online.  I would really like some giant keyboard posters for each lab, but they are expensive.  The ideas I’ve seen using take-out boxes to create your own would also be expensive and time consuming when I’d need to make them for six labs.   Since I couldn’t  afford to buy six giant keyboard posters, I made my own signs about Keyboarding rules (and the Homerow).  Feel free to use them too if you would like.  I’m including pictures so you can see how I mounted these rules on colored paper.  Later maybe I’ll find a deal on giant keyboards or think of a quicker way to make them.  I’d love suggestions!

Keyboarding Rules (Posture, Finger Position, Homerow)

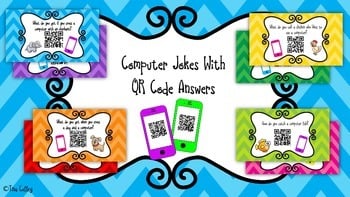
QR Codes are the latest and greatest craze in education, so for fun, I posted computer jokes with QR Code answers.  I posted these all around the lab.  You can snag those here:

computer qr codes
QR Computer Jokes

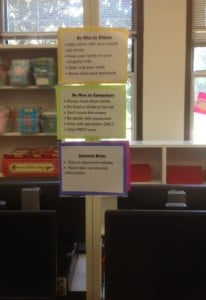
And our labs have had outdated rules (if there are any posted at all), so I create five posters for lab rules.  I did get this idea from the Elementary Tech Teachers Ning.  I made multiple copies of the signs for each lab.  First, I hung all the rule posters in one area, and then I hung copies of individual signs around the room.  The Arrival and Dismissal signs went on the front and back of the door, and the Be Nice to Each Other, Be Nice to Computers, and Internet Rules I hung in various places around the lab near the computers.  Here they are if you want to use them:

Computer Lab Rules

Finally, in some of my labs, I still had space, so I posted Control Key shortcuts.  You can find those below:

Control Key Posters

I’d love more ideas…so if you have any for me, please leave a comment below!